Reflections on Science Laboratory Sessions(Practicals)
Bold:ReflectionsNormal:The activities conducted
1P1: Getting to Know the Science Laboratory
For this practical, we drew a map of the laboratory and labeled the items in the laboratory, each represented by an icon, on their positions. After that, we learnt to identify the different hazards before we learnt how to draw equipment and know what purpose do they serve.
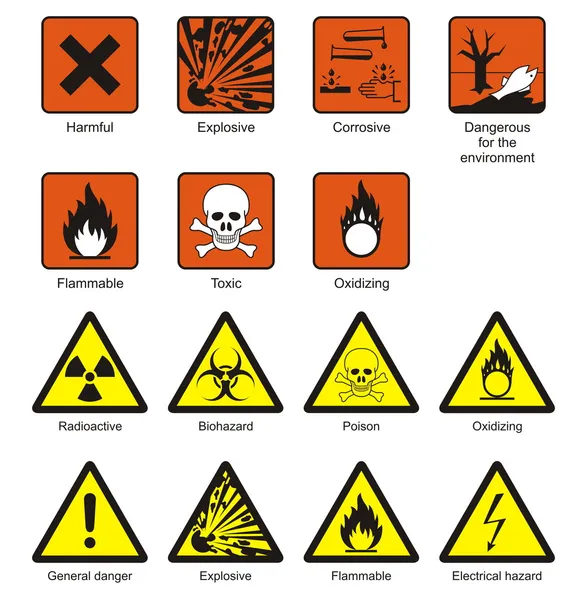
Adapted from:http://static5.depositphotos.com/1030113/401/v/450/dep_4017385-Science-Laboratory-Safety-Signs.jpg
This was our first practical in Hwa Chong and personally, I was quite excited on the first lesson. I think that this practical acted as a good introductory practical where we did not really do any experiments but just observe and also have knowledge of the 'dos' and 'don't' in the laboratory. Also, I think I learnt quite a lot today but I think the most crucial ones would be identifying the hazard symbols so you can know how to handle chemicals and equipment properly and the purpose of each equipment so you know what to use in an experiment and there would not be any accidents which may cause serious injury
1P2: Hot Stuff with Flames
For this practical, we were supposed to observe the flames of the Bunsen burner. After that, we placed an ice cream stick above the flame and observe what happens when it is a luminous flame or a non-luminous flame. Ms Chia explained to us the what causes the occurence of strikeback and what should we do when we face that. She then showed us the process of heating up the water in a test tube.

Adapted from: http://kohyizhescienceeportfolio.files.wordpress.com/2011/08/flames1.jpg
For our second practical, I think that the process of using the Bunsen burner is very vital as we always need to heat up substances before we can observe changes in the future experiments. Therefore, although we only observed, I think we now know better about how to operate a Bunsen burner and the luminous and non-luminous flame.
1P3: Observing and Recording Part 1
For this practical, we were to observe and identify whether it is inference or observation. We did a few experiments at the start first. Firstly, we were to pour vinegar into a test tube then add a spatula of sodium bicarbonate. Later, quarter fill two test tubs with water then add a spatula full of sodium carbonate to one test tube. We then shook the tube till the sodium carbonate dissolves. Add a dry spatula full of copper sulfate to the other test tube and shake it till the crystals dissolve. Lastly, pour contents of both test tubes together and observe and record it down. We still felt methylated spirits on our skin when we blew it. Then, we did the test for carbon dioxide and starch with limewater, exhaled air, iodine solution and starch suspension respectively.


Adapted from:http://www.uq.edu.au/_School_Science_Lessons/3.34.1ch.GIF
http://iweb.tntech.edu/mcaprio/starchtest.jpg
I think that for this practical, we felt and observed many chemical reactions through simple experiments and recorded them down and the whole process was quite interesting. I exceptionally liked the one with the methylated spirits where I felt a cooling sensation. Now, I think we would be able to observe properly so as to make logical inferences about something and not mix up the two terms.
1P4: Observing and Recording Part 2
For this practical, we were finally allowed to heat up liquid with the Bunsen burner. We all turned the colar so as to produce a blue flame to enable a speedier process. We were also supposed to record the temperature of the water with a laboratory thermometer every minute and record them in a table. We were also required to report to the teacher if a thermometer broke as Mercury, that is within the thermometers, is a poisonous substance. We then made use of a line graph to show our results more clearly, which Ms Chia taught us how to do it step by step and gave us some pointers.

Adapted from:http://school.discoveryeducation.com/clipart/images/graph.gif
This was the first or second time I was allowed to use a Bunsen burner by myself as in primary school, the teachers were usually demonstrating the experiments and we seldom get a chance to have hands-on because it was too dangerous., therefore, I felt excited when I heard we could conduct it by ourselves. Indeed, there is not only a big transition in terms of syllabus from primary schools to secondary schools but the overall process is too.
1P5: Pendulum Predictions
We basically made a simple pendulum and set the pendulum bob into oscillation but each time increasing the pendulum's length and observing its speed. We then recorded down the results in terms of the number of observed swings. Then, we plotted another graph and that was the end of our practical today.

Adapted from:http://scienceblogs.com/startswithabang/wp-content/blogs.dir/311/files/2012/04/i-22c66133347ea541074d8d73b79aa0fd-pendulum.jpg
This experiment, as the results has to be manually calculated, the more important takeaway for me is how to prevent human errors and precautions so as to make this experiment fair, which is important as if the experiment is not fair, the results and data collected would be affected and no longer reliable and accurate.
1P6: Measurement of Length
For this practical, we were taught about the measuring apparatus like vernier calipers, micrometer screw gauge and metre rule. We were suppose to examine the apparatus to check for their smallest reading, for example, for a vernier caliper, it is 0.01cm. Although the practical worksheet has required us to check the zero error but as Ms Chia said we need not learn about that first, therefore, we just treat everything as zero. We used the metre rule to measure the height of our seat from the floor at four different positions. We also used vernier calipers to measure the internal and external diameters of a beaker at three different positions. The micrometer screw gauge was also used to measure the diameters of the wire and ball bearing at three different positions.


Adapted from:
http://images.tutorvista.com/content/measurement-and-experimentation/micrometer-screw-gauge.jpeg https://blogger.googleusercontent.com/img/b/R29vZ2xl/AVvXsEiu3S2I0YAxTQxl4Y4DTSeGMdd6rvZnI-hbj-J6_P_sW6jE2okGKAqg7sa69kiVkg8m6wgTCa31q5ShytcULcZ2vvDIUg1AhLL_9MWnWjGmrExFm7APwUpKer2ZhV_tTRJ5ppBgM-n4fuEB/s400/accuracy.png
think this practical is successful in terms of teaching us how to use the measuring apparatus to measure the diameters and length of objects as we were taught verbally and through hands-on, I believe that after this lesson, all of us can already use them well enough.
1P7: Determining Density
Firstly, we were to determine the density of a regular solid, which we used glass marbles. We used lots of formulas and data to aid us in finding out the volume of marbles, the diameter of marbles, the mass of marbles(average between the five) to finally, the density of the marble. Next up, we were supposed to determine the density of an irregular object. To do it, we had to weigh it, pour water into a measuring cylinder and record it as V1. Later, gently, with a string, lower the object into the water and record it as V2. The volume of the object would be V2-V1. Then, we finish calculating the densities and our practical session ended.
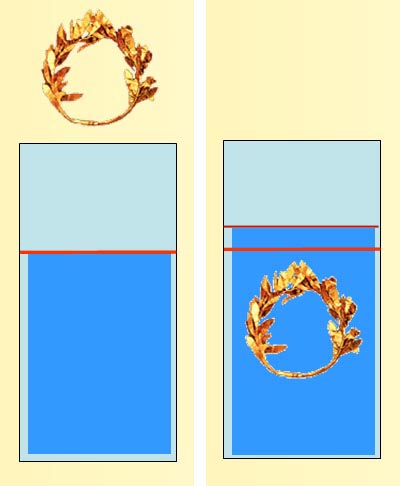
Adapted from:http://www.chemistryland.com/CHM130S/02-MMM/Measure/CrownBeforeAfter.jpg
As the measurements topics are more inclined towards memorising of the formulas et cetera, I would find this session slightly boring but overall, I think that this session was still a fruitful one, reason being even though it was boring, I learnt something new, which is how to find the density of an irregular object and the precautions that we must take when using the measuring cylinder.
1P8: Brownian Motion
For today's lesson, we were supposed to learn on the Brownian Motion. The reason why I did not call today's lesson as 'practical' as we did not really do any hands-on but just watched some video on Brownian Motion, where some included pollen grains floating on water to show us that the movement of particles are constant and random.
The below is a video uploaded on Youtube by Sciencebox2010 and it describes and shows the Brownian motion.
Adapted from:http://www.youtube.com/watch?v=UDj7BXA1CHU&feature=related
Although today we did not do any experiments but with the video, I think the overall effect is quite similar to us doing it, just that someone else was the one demonstrating. I think that for many students, it is quite tough for them to visualise particles moving constantly and randomly and through this video, we were able to better visualise and thus understand, therefore, I think this session was still an effective one.
1P9: Elements, Compounds and Mixtures
The aim of today's practical was to investigate the properties of a mixture and a compound. Firstly, we placed sulphur powder on a piece of filter paper. Then wrap one end of the magnet with a piece of paper and move it near the powder, obviously, the sulphur powder, which is not magnetic, is not attracted. Then we change the sulphur powder to iron filings and repeated. The iron filings were attracted. Later, we mixed both and the iron filings still got attracted but the sulphur powder did not. This meant that the properties of the elements were still present in a mixture. Later, we heated up the mixture and got a black solid and it was no longer magnetic. This meant that a compound does not possess properties of its constituent elements.

Adapted from:http://upload.wikimedia.org/wikipedia/commons/thumb/d/dd/Ferrous_sulfide.jpg/250px-Ferrous_sulfide.jpg
Although this session teaches us the difference in properties of compounds and mixtures, I think that we could have other small experiments to show the other differences between compounds and mixtures so that we can have a more all-rounded understanding of the differences. Overall, I still learnt something from this session and the experiments did today was quite interesting.
1P10: Forming Compounds
As a start for today's practical, we saw the demonstration of burning a magnesium ribbon in the presence of oxygen, which we were not allowed to experiment on as it was too dangerous. There was a really shiny bright light and magnesium oxide was produced, which is a compound. Later, we mixed iron filings with diluted sulphuric acid and it produced an effervescence of a colourless and odourless gas. Lastly, we combined sodium chloride solution with nitrate solution and a white precipitate was observed.

Adapted from:http://www.angelo.edu/faculty/kboudrea/demos/burning_magnesium/BurningMg05.jpg
Today, we tried different ways of forming a compound, which can be a reaction between two elements, like magnesium(Mg) and oxygen(O) to form magnesium oxide(MgO). Today's lesson was very interesting and exciting as we were all eager to find out what would happen next. I have really learnt a lot on forming compounds through this practical and I enjoyed the whole session.
1P11: Which can dissolve more?
We were to find out if the solubility of different solutes differ in the same solvent. We used three different types of solutes, salt, baking soda and iodine crystals with one solvent, water. Through our data collected, we then inferred that salt is the most soluble in water and iodine crystals is the least soluble.
Today's practical was relatively simple as we just have to test out the solubility of the different solutes in water but the more important takeaway would be the concept that the solubility of different solutes in the same solvent would be different.
1P12: A Separation Problem
For this practical, we were supposed to separate a few different substances with regards to their properties like for example whether they are magnetic. We used substances like iron filings, Styrofoam et cetera.
.jpg)
Adapted from:
https://blogger.googleusercontent.com/img/b/R29vZ2xl/AVvXsEgIk5BfLrzS6t_KC9GKK3sop2aG1-MoFP_DMwrjctV8h0HFvSqzvwRfbhB-w-rgImVLCBvwuauDczbowMOWfX0W1VH0j1x1aHvjp8NSagPHYHy6AkZBNo869zApk5cAXzI2c2ndCNFFH0U/s400/Spec+(separation).jpg
The session was a short one as the experiment could be finished quickly. I did a similar experiment before and therefore, I think that this practical session acted as an reinforcement for me as I recapped on the concept behind this practical.
1P13: Who Wrote the Secret Message?
This is a practical on paper chromatography. The story of the whole practical was that three suspects were caught for writing a message. Each suspect possessed a different brand of black ink, A, B and C. We were supposed to use chromatography to find out who was the one who wrote the secret message. We found out that the colour in A is only purple, the colours in B is pink and blue whereas the colours in C is yellow and black. The chromatogram on the screen showed pink and blue, which meant suspect that used brand b wrote the secret message.

Adapted from:http://reachoutmichigan.org/funexperiments/quick/csustan/chrom.gif
Paper chromatography is a type of physical separation method and are used to identify amino acids in one's urine et cetera. From this practical, I also learnt that it can also be vital in solving a mystery case. Although it was just one experiment, we needed to wait for the colours to be separated, which can take some time. This session taught me how the paper chromatography works and how to prepare this whole experiment.
1P14: Inside of Cells
We were supposed to get cheek cells from ourselves and an onion epidermal layer and observe them under a normal light microscope and we had to sketch their appearance.
I had a similar experience at the Science centre before, where we were supposed to observe the cells, therefore, today's practical was okay but as this was the second or third time I was doing this experiment, I felt that the results were expected and not so interesting. However, there was still a learning point, which is why should we gently place the slid on the cells--because it would prevent the air bubbles from blocking our view.
1P15: Bouncy Raw Egg with Moving Waters
The purpose of Bouncy Raw Egg is to demonstrate osmosis in living cells. First, we place a quail's egg in a beaker filled with dilute hydrochloric acid and we would observe that a gas would be evolved as the shell react chemically with the dilute hydrochloric acid. After 15 minutes, rinse the egg with tap water. We would realise that the egg is soft. Then, we were to soak it in water for 24 hours and we would observe it turned rigid because osmosis has occurred through the membrane of the egg. Later, for moving waters, it was just the observation that water from the beaker moved to the sucrose solution in the visking tubing down a concentration gradient through osmosis.

Adapted from:http://in.all.biz/img/in/catalog/159986.jpeg
Both experiments are all on osmosis, which I think is good because we would be reinforcing the concept so that we can better understand and remember it. Also, as there are two experiment, we also have different takeaways, like why is a visking tubing used to demonstrate osmosis et cetera.
1P16: Potato Bloating?
As we had not got back our practical paper, I forgot what type of solution did we use but this was the experiment whereby the potato chip was placed in a solution, also to demonstrate osmosis. I basically applies the same principles as the bouncy raw egg experiment, where the more diluted the solution is(hypotonic solution), the more rigid the potato would be.

Adapted from:http://image.wistatutor.com/content/feed/tvcs/osmosis3.gif
This experiment was a basically applying the principles of bouncy raw egg but in a plant cell now and we can see that it makes no difference. This session was quite straightforward but the takeaways, as always are not simple at all. Overall, I enjoyed this session.
1P17: Extracting Chlorophyll
Adapted from:http://www.youtube.com/watch?v=6j4QIbC_1Nc&feature=related
For this experiment, we are removing the chlorophyll from a variegated leaf, by boiling it first, then turning off any heat source(as the methylated spirits, which is flammable, were going to be used). Then, place the leaf in the alcohol in a beaker before placing it in another beaker with hot water. Jiggle the leaf till the alcohol turns green and the leaf is white. The green substance in the alcohol are chlorophyll.
This was an interesting experiment as at first when I heard we were going to extract chlorophyll from leaf, it would require lots of chemical reactions and/or separation techniques. However, I then realise how simple it was and that this method was commonly used. This session was enjoyable as it was fun watching the chlorophyll being extracted bit by bit in the process of heating it up indirectly.
1P18: Artificial Intestines
We would have a visking tubing containing solution of starch and glucose soaked in distilled water in a boiling tube. The visking tubing will represent the small intestines. Then, after some time, we poured the water in the boiling tube into two test tubes. Firstly, we conducted the starch test using the iodine solution on the sample in the first test tube. The iodine will turn blue-black if starch is present. For the other test tube, add a few drops of Benedict's Solution and place it in a hot water bath until boiling. A brick red precipitate would be formed if reducing sugars is formed. In the end, the water does not have starch but has the presence of reducing sugar, which is the glucose, which is also why we need to digest our food or they would not be able to pass through the walls of the small intestines and into the bloodstreams.


Adapted from:
http://bio662.dyndns.info/s3b/b3n/b3n01foodnutrition/images/dialysis_e.png https://blogger.googleusercontent.com/img/b/R29vZ2xl/AVvXsEgA2HEJrQJBIvMkbQ171Up4NKBezRY8iYePjV1uGtnm0Io4c-rAeAwsTxfWUQ-1blGbcbcZ2-uySEST4VDiBBIY5tKD5UwreRdOV6Kznk3HE_Ng4_MpIBx9k218retPV8BF_XrHEaTSuXk/s1600/BenedictsTest-1.jpg
This was our last practical of the year and honestly, it was a good finale for practical as we brought out two different concept in one experiment, one on diffusion and the other on digestion. This practical was a fruitful one and taught me a lot and I thoroughly enjoyed it!
Well, that is the end of my reflections on laboratory sessions.
Reflections on field trips and sabbaticals
For both terms, my sabbaticals were on Science and one of them were about field trips. For Term 2, it was on Biology, Chemistry and Physics whereas in Term 3, it was on Ecology and environmental Science.
Term 2: Science Eureka
Day 1: For today, we were mainly focusing on physics. We did stuff like building the strongest bridge with ice-cream sticks and causing water to bend due to static charges.
Today, the physics experiments were not in the syllabus and were very complicated but the trainers manage to make us understand. The session was fulfilling and interesting and at the same time, taught me lots of new things about Science.
Day 2: Today, we mainly did experiments on Chemistry. We did experiments like turning a copper strip into silver then gold through the mixing and heating up of the mixtures.
The trainers today were busier because we had a lot more problems than yesterday, reason being the reactions sometimes took longer than usual or because something went wrong and the experiment would also not work. Although we will have another session on Chemistry, I already felt like I learnt a lot, a lot, a lot... However, this also meant that I benefited from this sabbatical.
Day 3: Today, we were doing experiments about biology, which included using casein to make glue, using pectinase to increase the juice yield et cetera.
I has been looking forward to the third day as we would be doing Biology, which I am interested in. At first, I thought we would be studying cells or human anatomy et cetera but in the end, we were doing about enzymes and proteins. I was a little disappointed but at the day went by, I found myself enjoying the experiments very much. It made me realise how diverse Science can be.
Day 4: Today, we are back at Chemistry but it focuses a lot on colours. We did the scraping of copper coil and placing it in silver nitrate and amazingly, it turned silver. I was curious and asked, are this pure silver and the trainers said they were. Also, we also formed rainbow reactions with the chemicals. We were then told of the topics for tomorrow's 'test' where we presented on optic fibres.
Today's experiments not only made me learn more on Chemistry but also made me start to grow to like Chemistry and appreciate its concepts. The reactions that we can get are also very cool and sometimes surprising. I am so glad that I made the right choice and chose Science Eureka as my sabbaticals.
Day 5: Today, we were supposed to present on our topics and we were given some time to prepare first. We also had a small written test and to my utmost surprise, I achieved a 14/20 and was overall 2nd in the course. However, I think that for the presentation, ours were too wordy and detailed and we did not prepare ourselves well, therefore, we still have a large room for improvement.
Five days have just passed in a blink of an eye and today was the end of my first sabbaticals. I felt sad that I was unable to conduct so many more interesting experiments but also full of anticipation for the holidays. If I were given a choice, I would not mind giving up another week of my holiday to conduct the interesting experiments. Science is indeed all around us. So long as you know how to appreciate its beauty and put in effort in getting in understood, you will soon taste the fruits of your labour. Fighting!
Term 3: Environmental Science: Green Learning Journeys
Day 1: As today was the first day of the sabbaticals, we did not go for any field trips but instead, we stayed in school and were given an introduction to Ecology and Environmental Science. Dr Tan gave us a presentation on Climate Change and told us how much rubbish that we produce a day and others. The number was shocking! Then, we watched a movie, The Day After Tomorrow, which greatly depicted all the sudden weather and climate change. The main characters in the movie were struggling to survive all the flooding, hailstorms and many other natural disasters. In the end, they were lucky and survived through it. Later, we were shown videos and presentation on how rubbish were buried in Pulau Semakau Landfill. We were also taught why the three Rs, Reduce, Reuse and Recycle must be in this order. It is in this order because reducing requires lesser energy than reusing and reusing requires lesser energy than recycling. However, rubbish would be better off recycling than thrown away.
I have learnt a lot on Environmental Science and Ecology today through the videos and presentations. Till now, I would already rate this sabbatical a 9 out of 10 as it is not only interesting but it also has great educational value. I feel fortunate that my friend recommended me to choose this sabbatical so that I could possess a great knowledge of not only Science that we would learn in school, but also those out of the syllabus, which is Ecology.

Adapted from:
http://swotti.starmedia.com/tmp/swotti/cacheDGHLIGRHESBHZNRLCIB0B21VCNJVDW==RW50ZXJ0YWLUBWVUDC1NB3ZPZXM=/imgthe%20day%20after%20tomorrow2.jpg
Day 2: After being in school for one whole day yesterday, we were going to go out for a field trip today! After a short brief on our trip today by our seniors, we went for recess and after that, headed towards MacRitchie reservoir for a EcoRitch trail. The trail had two parts, the Prunus trail and the Petai trail, and we were only walking on a wooden plank that was not fenced up, which meant that we were actually allowed to experience nature at its most original way, where nature intended. We saw a lot of species of plants but as for animals, we did not manage to see much, which was quite a disappointment.
The EcoRitch trail was the first field trip that we went for our sabbatical and different from yesterday's climate change topic, today was more on the conservation of nature and animals.The whole trail was very long and was quite tedious to keep on walking but as we appreciate the beauty of nature while walking, we did not end up as tired as we thought it would be.

Adapted from:http://moireosullivan.files.wordpress.com/2010/01/reservoir_map.jpg
Day 3: Today, our schedule was packed with outings. Firstly, we went to the Senoko Incineration Plant(Waste-To-Energy, WTE Plant) to learn more about how the rubbish would be incinerated. We were all astonished by the amount of rubbish there and we were all discussing about a matter--At first, I said that if I went inside the container with rubbish, I would need to bathe for more than three days three nights straight but my friend then said, are you even able to get out of that whole chunk of rubbish. The was also an acrid smell there when we were not even in the container with the rubbish, showing the extent of the amount of rubbish there. Later, we went to a more pleasant-smelling place, which is the Oh Chin Huat Hydroponics Farm, where we went into a lot of places in the farm, for example, the storage room that was 4-8 degrees Celsius. We went on to look at the cucumbers growing, the strawberries that could not be grown in Singapore but able now as the conditions were able to be controlled. We were also allowed to smell the spearmint and Japanese mint and chew some basil leaves. The guide told us that if you could feel a slight spiciness on the tip of your tongue while chewing the leaves, it meant that you were healthy as only diabetic or unhealthy people or smokers would not be able to taste the spiciness and well, I did. In the end, there was the quiz whereby if you answered one of his questions correctly, you will get a free plant. I was very lucky and got a Japanese rose(worth $1.50) for free. Now the plant already has flower buds. At the end of the whole trip, we were all given two packets of vegetables for free.
Today was a fun day in our sabbatical and we really benefited a lot from the trips. We first learnt how the rubbish were incinerated in a Incineration plant then learnt the benefits of growing hydroponics and other interesting facts. Now, I would be more than willing to rate this sabbatical a 11 out of 10. I hereby urge everyone to not only reduce the amount of rubbish thrown away but also dispose of them properly, for example, recycling them.


Adapted from:http://www.singaporefva.com/images/advert/oh-chin-huat.jpg
http://jdc-corpn.com.sg/img/civil/TSIP-1.jpg
Day 4: Today, we were going to learn about the solar panels. When I was young, I thought that solar panels were blue tiles for making the building look cool and unique but as I grew older, I realise that was not the case but instead, those could produce energy. This time, we learnt about the solar panels in our school and their price and procedure of building them on the different locations. They had to decide where was the locations where the exposure to sunlight the most so that there will be the most energy possible produced. Later, we had an activity, which is to calculate the energy used up by this classroom in a year, the amount of money we had to pay for it et cetera.
Today was the last day of my second sabbatical. Today's sabbaticals taught me a lot but was relatively boring as compared to the other days as we were just sitting there listening to the presentation. I enjoyed the whole sabbatical but I admire the future batches as they would be going to places like Gardens By The Bay and other more interesting trips.


Adapted from:
http://solarenergy.wiki.hci.edu.sg/file/view/hci_solar.PNG/259550210/hci_solar.PNG
http://solarenergy.wiki.hci.edu.sg/file/view/solar_hci.PNG/259550214/437x459/solar_hci.PNG
No comments:
Post a Comment